It is amazing how disappointed I was after abandoning the M-55. I even lost a bit of confidence in my own skills. I had to do something about it so I went back to what I consider fun builds, and for me it is building a plane designed by Fabrizio Prudenziati. While he himself is no longer among us, his heritage is large enough to keep me busy for the coming years and then some more. Thanks for that, Zio. Really, your planes keep on bringing me fun.
After the M-55 was ditched, I first did a little Gloster Gladiator. One of Britains last biplanes and still a fierce fighter in WW2. I chose the 'silver' version and just started and built it in about two sessions. Curving the hull was I think the most important point in the build, the rest just more or less built and shaped itself into the final product.
I used tiny beads to make the propeller rotate but for the rest I just followed the instructions and left is as-is. And there it was. Wahey!
 |
| The trick with these struts is to put a small dab of white glue on the wings and let it dry a little. Then add the struts in about the position the need to end up in. Then dryfit the top wing and carefully push the struts in their almost final position. When adding the top wing, follow the same process with drops of white glue in the place the outer struts will go and first attach the wing to these struts. Then, add some glue to the inner struts and push them into their position on the top wing. At least, that's how I did it. |
Immediately after finishing the Gladiator I printed another Zio model, this time the Caproni C-133. A little bigger, a two-pager, and with a brilliantly tacky, Italian nouveau riche panther print design all over it, making me nickname it "the Gucci bomber".
So, this being a two pager made it a little more elaborate. Three engines, one large complicated hull and a lot of struts to go underneath the wings.
 |
| Especially the connection between the cockpit windows to the sides of the hull were flimsy and needed careful handling. The wing-shaped cutouts don't need to be that sharply followed at the trailing edge, either. |
 |
| I added some very subtle carves over the hull where the ribs run. This adds just a little more depth. |
 |
| Whithout a proper instruction sheet, I almost forgot this gunner's manhole. The kit provides you with a shallow black box to go underneath it. Add this before you close up the hull, it saves you a lot of trouble. (-; |
 |
| I thought the hull got a little too flexible so I added a little upside-down U shape as a reinforcement. It really added to the sturdiness. |
 |
| And although I didn't expect it, the complete wing easily shoved into position between the cockpit windows and the manhole. Just a little fiddling with the position and there it was. |
 |
| A little square piece of panther print over the white surfaces and lo, a closed-up fuselage. |
 |
| But... Where does this piece go? |
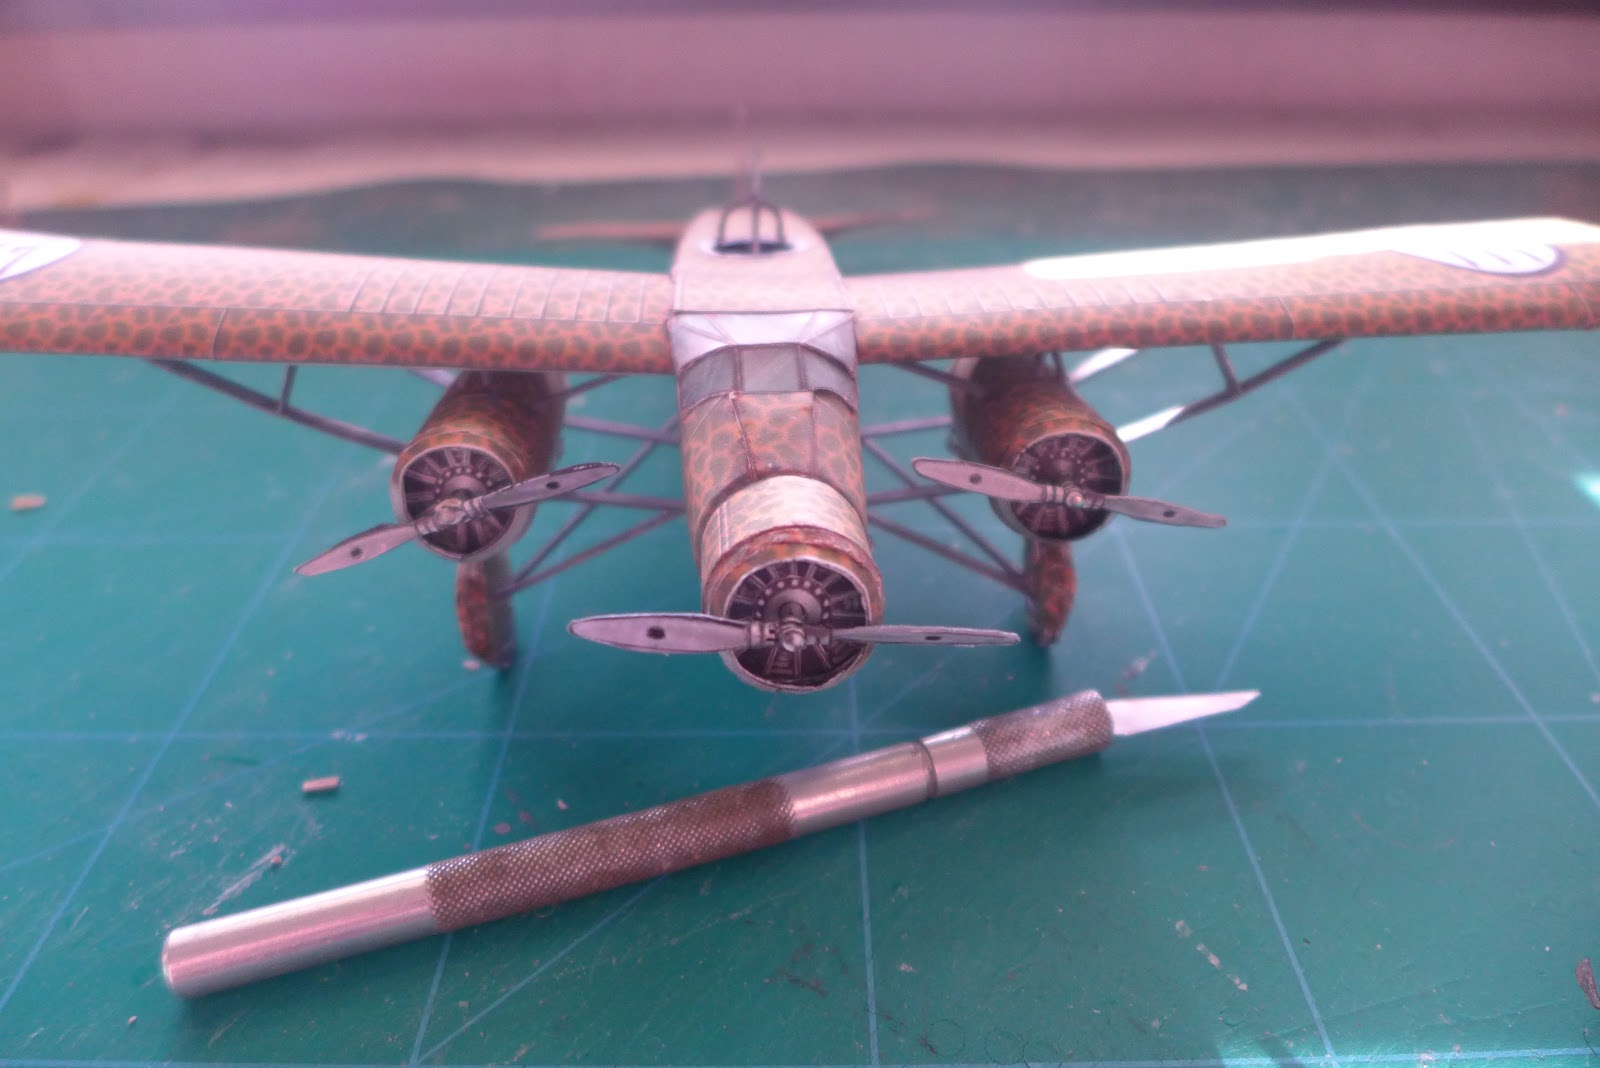
The engine nacelles were petalled, not my favourite way of shaping a point but in the end they looked reasonably well. Remember, these were fun builds, so I had absolutely no aspirations of making it a contest-quality model whatsoever. Still, it looked okay. A little edge colouring made it look even better. The props all were built with a pin and beads to be able to rotate.
The struttery was the main issue in this build. Firstly, although the model almost builds itself, meaning there almost is no doubt where all the parts need to go, the struts were a bit of a problem. Numbering would have been a bit helpful. But looking at drawings and photos I also discovered some struts were missing. Next I realised I couldn't get the props to rotate when I used the provided struts. So I made my own. I used a little paint to fit them in colourwise.
 |
| The small strut between the nacelle and the wing was not in the kit. The original struts leading to the fuselage were just too short for the prop to rotate. These ones I made myself were better. |
 |
| Now this is where I admire Zio's art. His models sometimes have shape like this that just magically fit together even though you think, when cutting them out, Oh help, this is absolutely going to be a disaster when glueing. They are not. And they look gorgeous on the plane. |
 |
| And yes, this plane is a struttery champ. Note the small struts in the outer ones on the leading edge. They also were not in the kit. And the fuselage-to-wheels- struts also were much too short. I made mine all from passepartout- cardboard. You know what kind of paper I mean with that. |
 |
| Here another view on how the struts evetually ended up. |
 |
| Andiamo! Dai dai dai! All aboard the Guccibomber! |
The result is I now have two more planes to clog my shelves but they were a lot of fun to build.
Now it is time to tackle the issue I had with the M-55, that one being the first plane I ever started with an internal frame structure and a wrap-around skin. I have to get some skill in that before I do the Myasishchev again at a later date. Because yes, I still really want that plane on my shelves. So I soon will start a small project to make a more thorough study if you will of how such a model works. And hopefully turns out right.
Well, I guess I went on long enough in this post. Hopefully there won't be a gap this long again before I post again.
Thanks for stopping by and all that.
Until next time,
--PK.


No comments:
Post a Comment
attention spammers: all posts are moderated before placing.
you won't get through. you lose.